Quantcast
Channel: Sweeten Your Day Events
Viewing all 54 articles
Browse latest View live

Bee Mine Valentine Class Party {treats}

$
0
0
This year I was asked by my son's first grade teacher to organize and put together their Valentine Class Party. This is the first time I have been in charge of one, but have helped out before many times before, so I was ecstatic to do it!
After searching the net for some ideas I can across these absolutely adorable printables from Bird's Party that were perfect for so many reasons!
First off they are free! You can't beat that! They are great for all ages, and not too girly so boys can enjoy them too. Last my son's school mascot is a Bee/Hornet :)
Once I had my theme I started thinking of the treats, that is always my favorite part. For the center of the table I made a cupcake hive (tutorial found here) designed to match Bird's graphics. 
Then I filled the hive with pink pastel iced cupcakes topped with their matching topper printables, just too cute!
Along with cupcakes Pink Lemonade to drink.

I wanted to create a special treat for the teacher as well. So I got a small vase and filled it with pink sixlets and made some lolllipop flowers.
Last for the a cute little take home favor I got some gumball tubes and filled them with alternating layers of pink and black gumballs with a cute little 'Bumble Gum' label.
That is it for the treats for the party, keeping it light since they will also be getting lots of valentines from their classmates :) Be sure to check out the next post for all the activities too!


Bee My Valentine Class party {activities}

$
0
0

The way our school has done class parties in the past are only about an hour long and the kids get divided into groups and then rotate around to different stations were they play a game or make a craft. I figured that I would just stick with what they know and came up with 5 different rotation activities for them to enjoy, all staying with the Bee theme of course :)
I am going to try and keep this post not too long, so some of the descriptions are brief and hope they make sense.
#1 Antenna Assembly - craft
 For this craft the kids are making little antenna headbands to wear as they buzz around the party!
Cut a large piece of cardstock in half (I did yellow for the boys and pink for the girls). Let the kids decorate their papers with crayons, markers, stickers, etc. Measure the kids head and staple the pieces together. Then punch 2 holes in the front side and thread black pipe cleaners through. Glue some colorful pom poms on the ends and done!
 
#2 Pin the Bee on the Hive - game
This one is pretty self explanatory... I enlarged Bird's printable Beehive and cut out some small bees and attached some poster putty on the back to make them stick. 
This game isn't very long, so during this rotation the kids are also going to pass out their valentines to the other classmates boxes.  
#3 Buzzy Bee Valentine - craft
I found this cute little idea via pinterest 
What you need per bee: 2 googly eyes, 1 black pipe cleaner (folded in half), an oval piece of construction paper for the body, 2 matching long strips for the legs, 2 shorter ones for the arms, 3 black strips for the stripes, 2 small red hears, 1 large white heart (cut in half for the wings), glue, crayons or markers to decorate. 
*Have everything pre-cut to save time and make it easier for the kids to assemble. We did yellow for the boys and pink for the girls. 
 #4 Heart Hive Tower Stack - game
For this game you just get a couple of bags of large conversation hearts. Go around the table and each kid stacks one heart on top of each other at a time, trying to build it as high as they can without knocking it over (kind of like Jenga in a way). When it falls over, just start again trying to build your Heart Hive taller each time!
#5 Pollen Pong - game
I also found this game via pinterest and thought that the kids would go wild for it!
For this activity take 2 different colors of paper plates and glue a jumbo Popsicle stick or tongue depressor on the back to make a paddle, decorate with a flower. Then blow up a large balloon and draw a Bumble Bee on it with a marker. 
To play: Hit the Bee with your flower paddle back and forth (collecting pollen) trying not to let it touch the floor before it gets to every flower.
 Well that is it for the activity portion. The class party again is only about an hour long, so each rotation will be about 10 minutes long and then another 10 minutes at the end for treats and refreshments. I hope you all enjoyed these posts and gives you some ideas for your own Bee Mine celebration! Again don't forget to stop by Bird's Party for your set of Bee My Valentine printables today!

Vintage School Baby Shower

$
0
0

One of my dear friends was expecting a sweet little baby girl soon but she didn't want to do a big shower since she already has a child, but I couldn't resist doing SOMETHING! So we decided that a nice little lunch with some close friends would do.

I just LOVE LOVE LOVE themed invitations and these ones from Invitation To Mars were just too cute to pass up and perfect for the theme!

How cute are these details!?!

For the table centerpiece I kept it simple with a vintage pattern table runner, basket of apples, mini chalk board, baby blocks and flash cards.


We had a light lunch served in the traditional brown lunch sacks, but I wanted to dress them up a bit. So I folded a doily over the top and tied them shut with a cute little ribbon to give them kind of a shabby chic look.

Inside the lunch sacks was a chicken salad croissant sandwich, bag of chips, container of leafy salad with a wooden fork, and a small fruit cup with alphabet cookies. Yum Yum!

And refreshments of course...

We had just a simple little dessert bar to keep it light with few treats. The backdrop was a vintage window I had and covered the glass with different vintage styled paper patterns to give it some color. Then I hung some flash cards with clothes pins for bunting. The table was accented with stacks of books, apples, and more baby blocks and flash cards.


I tried based the main treats off of what I used to have in my sack lunches growing up: Pb & j sandwich, an apple, usually some cookies or chips, and a carton of milk - gotta love themes! So here is what I came up with:
Peanut Butter and Jelly Bars

Cookie and Milk Parfaits


 and Mini Apple Pies

That is our little baby shower lunch, SUPER budget friendly!
Vendors:
Event Styling and photographs: Sweeten Your Day Events
Invitations: Invitation to Mars
Vintage Flash Cards: Pretty Little Studio
School Theme Inspiration: One Charming Party

School Themed Invitations Giveaway!

$
0
0

Today we have a very exciting giveaway on our blog!

Invitation to Mars is all about making simple a little extra special! Amanda designs custom, and out of the ordinary party, event and everyday goods. Invitations, thank you cards, favor tags, transfers, cupcakes toppers, or anything you have in mind!

Here is just a taste of their beautiful work!
Personalized Gift Tag
PRINTABLE Dress Up Party Thank You Cards. Paper Doll Thank You Cards.
Dress Up Birthday Party Cupcake Toppers
PRINTABLE Baptism Invitation. Christening Invitation. Naming Day Invitation.
Cowgirl Birthday Party Favor Tags
PRINTABLE Gender Reveal Cupcake Toppers (School Theme)
Easter Basket Tag
PRINTABLE You Are My Sunshine Birthday Party Invitation
Mother's Day, Father's Day, Anniversary, Grandparent's Gift - 11x14 family tree
I always have such a blast working with Amanda, she is so fabulous and the details are AMAZING! You may remember some of her details from our Gender Reveal Election we did last year...
I had the pleasure of working with her again on our Vintage School Baby Shower, and again the details were OH SO CUTE!
Just check out the invites!
Gender Reveal Invitations
Absolutely adore the tags!
And know for the exciting part...
Invitation to Mars has offered to giveaway a set of
Scroll down to the bottom of the post to see how to enter...
Gender Reveal Invitations
The prints are on a flat cream, linen 5x7 card stock. The school themed invitations are bundled as a set of 6 nostalgic flash cards, 
1 report card, and a #2 pencil with attached flag. 
They come tied with bakers twine and a manila envelope, 
reminiscent of school report cards.
Gender Reveal Invitations
You will also receive a set of these adorable
 Printable Chalk Board Thank You Cards!
PRINTABLE Chalkboard Thank You Cards
A package worth over $75!!!
Enter to win by following the steps below, the more you do the more chances you have to win!
Good luck!
a Rafflecopter giveaway

Butterfly Dessert Table

$
0
0

I recently helped co-host a bridal shower for my sweet little cousin that is getting married. I was charged with the games and dessert... my two favorite things! When I talked to her about what she wanted she said that her wedding colors where lavender and light purple, and she also mentioned that she loved butterflies. I love having specifics to focus on and with those being the key things my mind went to work and this is what I came up with...
I tried to keep it light and simple. I wanted white to be the main background because it is a bridal shower and have the purples be the accents. I hung purple rosettes with white butterflies for the backdrop. For the accent decor I spray painted long tree branches white, glued on butterfly cutouts, and put them in tall glass vases with some purple fabric at the bottom. 
The 3 tier cake was the main focal point on the table. For the refreshments we served cupcakes in champagne glasses, marshmallow pops, donut pops, and blueberry parfaits in champagne flutes. I also put together little bags of 'Butterfly Kisses' as thank-you favors for guests to take home. 
Donut holes dipped in white chocolate, because I was to lazy to make cake pops! I also glued mini butterflies to the sticks to give them some color.
I put sprinkles in the bottoms of the champagne glasses (from the dollar store) to give them a bit of color, then placed inside the cupcake topped with a cute little butterfly. They turned out so cute, I think these were my favorite part of the desserts and a fun way to display the cupcakes!
The marshmallow pops were dipped in purple chocolate and then rolled in a fun little mixture of sprinkles and sugar pearls that I love to do. The same mixture is also topped on the cupcakes :)
Vanilla yogurt with blueberries in champagne flutes (also from the dollar store) with butterfly place cards from CraftCut.
I purchased most of the butterfly cutouts for the decorations from Things by JuJu on etsy.
 
The adorable favor tags were from The Paper Goblin.
White butterfly assortment and rosettes from Taffie Wishes.

Event styling & design, photographs, and desserts:

Kids GB Proton Pack Tutorial

$
0
0
Last year we did a Ghostbusters party for my son's 6th birthday you can find here. For one of the activities the kids got handmade proton packs that shot silly string proton beams and went ghost bustin'. It was a ton of fun! I took pictures while making the packs to post a tutorial and completely forgot until recently when I got a few requests for tips on making them. So here you go and sorry I didn't post earlier!

For the proton packs I wanted to keep it simple and CHEAP since I had to make so many of them!
Supplies used:
large gift box - roughly 12x18 (the kind I would usually get clothes in from my grandma :), small square jewelry gift box, plastic cup, 12" round cardboard circle, toilet paper roll, black ribbon, black spray paint, red shiny scrapbook paper, 2 different colored electrical wire, black tubing, spray can trigger, hot glue and glue gun.

To assemble the base you need these: 
I cut the toilet paper roll in half,  and trimmed the cup down a bit. Then glued them all on one of the large gift boxes. I glued the lid of the smaller gift box on the top right because is was thinner and the bottom of the small gift box on the bottom left.
Note: I used elmers glue to attach the plastic cup because the hot glue was melting the plastic.
Then spray painted the whole thing black. While that was drying I used the bottom part of the large gift box to make straps for the kids to wear.
I cut to slits towards the top, and two slits approx 3/4 the way down. Cut 2 long strips of ribbon and insert one end into the cuts.
Fold over the end of the ribbon and hot glue it down to the inside of the box.
Repeat inserting and gluing the ends into place. Here is what the inside of the box looks like.
Next I lined the edges of the box that had the straps on it with hot glue in inserted it into the lid (painted box) so they were glued together... sorry no picture!
For the accents on the proton pack I googled 'Ghostbusters Proton Pack Warning Labels' and found an image of one of DANGER labels.
I copied and printed them off small enough to fit on the top right box. Then using a 2" craft punch, I punched out 4 circles and glued them on the to large circle glued at the bottom of the pack. I poked a small hole in the center of the cup and box below the toilet paper roll. Last I cut 2 strips of the colored electrical wire and glued one end into the toilet paper roll, and the other end into the cup and box.
For the last step I got these plastic things that attach to the tops of spray cans from Home Depot. They fitted silly string cans perfectly!
I poked a hole into the side of the proton pack. Cut a strip of black tubing long enough for kids to be able to stretch out their arms and shoot with. Glue one end of the tubing into the hole in the proton pack. Then I used some black electrical tape to attach the other end to the trigger. 
Here is my son modeling the finished product... 
Notes:
I only painted one side of the boxes because I didn't want any paint to rub off onto kids clothes.
The labels for the silly string cans were custom made by Jenny of Bloom Designs. Thanks again for your fabulous work!
I hope that this helps anyone interested and it all makes sense. These were such a hit at the party, the kids LOVED them! I used simple products that I could find, but feel free to substitute with whatever you can find. Good luck and please comment with any questions or thoughts :)

Hogwarts School of Witchcraft & Wizardry - Quidditch/Hogsmeade

$
0
0

The last activity we had planned for the party was every wizards favorite sport, a quick game of Quidditch. 
I made brooms for all the kids to ride on out of wooden dowels, some raffia, and craft grass. The hoops were made from funny pipe from Home Depot (the black tubing for sprinklers), wooden stakes and gold spray paint. 
There are many different ways people have posted online on how to play, I just found a version that I thought would work best for the our age groups. This was one of the highlights from the party! The kids absolutely LOVED it! Some of the adults got involved too because they saw how much fun the kids were having :)
The b-day boy was of course the Seeker for Team Gryffindor! 
After Quidditch was over it was time to cool down with a trip into Hogsmeade for some Butterbeer to end the day.
The Three Broomsticks Inn
We used the recipe by Autumn Clemens on Design Dazzle. The cream on top is absolutely delicious! But we cut the amount of extracts in half (you could taste the artificial flavors too much) and it a definite crowd pleaser.
I also created this Barrel Dispenser for a fun way to serve the butterbeer from the tutorial over at Chica & Jo
And last, but not least, was our visit to HoneyDukes Sweet Shop!
Honey Dukes logo was on Devianart, the candy labels  were from Over the Big Moon, and all the treat boxes were designed byPropPrintables
Bertie Botts Every Flavour Beans
Ton-Tongue Toffee
Sugar Quills - ordered from Etsy shop SugarDukes
Acid Pops - painfully sweet
Chocolate Frogs
Wizard Cards - there was even a custom one of the birthday boy 
Fizzing Whizzbees - a real sugar high!
Cockroach Clusters
Licorice Wands
Peppermint Toads - my personal favorite!
Cauldron Cakes
and Exploding Bon Bons

Well that FINALLY wraps up all of the posts! I hope you enjoyed sharing in our Hogwarts School of Witchcraft & Wizardry series and inspires your own magical adventure! I have to give one last HUGE thanks to all the wonderful vendors, especially PropPrintables, for all their help and fabulous products. Also thank you to all who have done Harry Potter parties in the past, they helped inspire our own party as well!

If you missed any of the other posts you can check out the rest of the party details here:

Hogwarts School of Whitcraft & Wizardry - Great Hall/Favors

$
0
0

After classes were finished, we all headed into the Great Hall for a feast (cake and ice cream).
I made the cake designed after one from Debbie Brown. I loved the little wizard owl sitting upon books,  I thought it was perfect for the theme. 
The Great Hall was decorated with a Hogwarts birthday banner downloaded from Pantone Pearl, floating candles, torches, goblets and gold chargers.  
While the kids were feasting, we passed out their O.W.L. results from their classes...
Since all the students passed their exams they were able to pick up their party favors from 
Filch's Emporium of Confiscated Goods...
The proclamation was from Outlaw Heart Paper Co., and I printed the wand label from the RPF and covered boxes of sparklers for each child.

You can check out the rest of the party details here:

Hogwarts School of Witchcraft & Wizardry - Sorting/Classes

$
0
0

Now that we have arrived at Hogwarts the first thing we needed to be sorted into our houses...  
To sort the kids we used cell phones. I called my hubby and put my phone on speaker and shoved it in the hat. When I placed the hat on each child's head he could hear and respond to what the kids were saying and then would shout out what house they are to belong to.
Once they were sorted they received a coordinating badge and tie.
The ties and badges were also downloaded from the fabulous PropPrintables!
Here is my little birthday boy being sorted :)
Now that the students are all sorted it was time for lessons...
History of Magic
A quick class where we briefly discussed a bit about wands.
Spells & Charms
The students matched the correct spell or charm with what they did.
Transfiguration
The kids were given some playdough and had a list of items to try and tansfigure it into different things...
Care of Magical Creatures
The kids headed outdoors to look for hidden dragon eggs
The kids put them in a fiery cauldron to hatch while we read about how to care for baby dragons.
When we finished discussing the eggs were ready to hatch. Inside was a baby dragon :)
They were those water expanding toys. The green dragon is the original size and the pink dragon is how much it grew after being in water one day...
Divintation
For divination I created a crystal ball by taking a Magic 8 Ball toy and painted it with silver glitter spray paint.
The kids were to write down a couple questions and then ask the crystal ball for the answer :) 
Mason's question was "Will I get another party?" and his answer was a definitive YES! Looks like I have some more planning to do!
Potions
The kids made a Beguiling Bubble Potion...
The Aconite Fluid was baby oil; for Basilisk Venom you can use water or club soda; the Mandrake Root were dog treats; Dragon Blood is food coloring; Unicorn Horn Powder is glitter; and Runespoor Eggs are Alka Seltzer tablets.

Mixing in the Dragon Blood with a Mandrake Root...
Once you finish mixing in all the ingredients add small pieces of Runespoor Egg at a time to get a Lava Lamp look...
It is pretty cool! The more Egg you add the more it bubbles and fizzes!
Herbology
For herbology I wanted to do something other than a Mandrake, so I figured Fanged Geraniums are mentioned in the Order of the Phoenix so we went with that. When I hear the name the first thing I think of is Venus Flytraps :)
Packets were printed from the RPF
The kids took turns feeding the Geranium little pieces of meat, it was fun watching their expressions when the trap would close shut.
Defense Against the Dark Arts
The kids learned about Dementors and the Patronus Charm to protect themselves. After we were done talking we headed outside for some practice, but look what was waiting for us! A Dementor!!!
It was actually a piniata that I draped with a black plastic table cloth and cut the ends to look ragedy. The kids had a large wand (stick) and would practice by hitting the Dementor and saying "Expecto Patronum!"
Astronomy
We ran out of time for the Astronomy class, but I was going to have the kids pick a constellation and make a star make using black paper and poking holes with a pin where the stars would be. They would be able to hold the paper up the light and see the constellation shine through.

The information for this book was inspired by Wilkinsonquints and most of the text information came from Harry Potter Wikia. Pictures were gathered from various online sources as well.

You can check out the rest of the party details here:

Hogwarts School of Witchcraft & Wizardry - Diagon Ally/Platform 9 3/4

$
0
0

Before students go to school they need to get their supplies, and where do you go to get wizarding school supplies? Diagon Alley of course! Using the list that I created in their invitations I set up a little row of shops for the students to visit before the party started to pick up all the items they would need. The wonderful Sera ofPropPrintables was so fantastic to work with again! She custom created street sign and all the store signs for me! I was just overwhelmed with how they turned out. And now lets go shopping...

Diagon Alley
The first stop was Gringotts Bank.
The kids filled out little withdrawal tickets from Uniquely Grace and got a small bag of gold galleons to buy their supplies.
Next was a stop at Madame Malkin's Robes
With so many kids coming I didn't want to blow my budget on robes for all of them but wanted them to wear something.... so I found this super easy and cheap tutorial over at Tiny Scissor Times on how to make robes out of black plastic table clothes and tape! Here is the b-day boy modeling them for you :)
Then we came to Ollivander's Wand Shop, this was probably the most exciting one for the kids!
I ordered these super cute wands from JCustomWoodBurning on Etsy and made the boxes out of poster board, foam, fabric, and the box labels were printed from theRPF.
The kids had a blast picking out their wands. They took their time and chose very carefully! Each wand was different and came with a description card of what the wand was made of, length, magical core element, and rigidity.
Also at Ollivanders the kids picked up a little booklet from Party Scribbles to learn proper wand care.
On to pick up the things we would need for our lessons...
A book from Flourish & Blotts
Each kid picked up a copy of Standard Lessons (Grade 1) that I made. Inside was the student's schedule and class worksheets, but more on those in the next post!
And a re-inking quill from Scrivenshaft's
I absolutely loved the quills! They were also fromPropPrintables and super easy to make!
 Next visit was at Pottage's to get a cauldron to carry everything in...
Students were also allowed to bring with them if the desire an owl, cat, or toad, so we made a quick stop at Eeylops Owl Emporium. 
Here are my two cuties with the owls they picked out :)
First year's were not allowed their own broomsticks but we did pass the Quiditch shop on our way.
Now that they have everything, it is time to head off!
Platform 9 3/4
I got the idea for the platform from so many others on pinterest. I re-created it by hanging brick patterned corrugated paper over the front door and cut a slit at the bottom so kids can walk through.
The platform was decorated with suitcases and other things that students might take to Hogwarts...
I filled one of the suitcases with various items from the movies that might come in handy during a year at Hogwarts.
Chocolate frogs, yum yum! (movie #1) and Weasly Wiz-Bangs (Movie #5)
The Daily Prophet to keep up on all the wizarding news (movie #3), and a copy of Advanced Potion Making with notes from the Half-Blood Prince to get you ahead of the class! (Movie #6)
Along with your book, you may want to come stocked with some potions on hand... just encase!
Poly Juice Potion (movies #2/#4)
Veritaserum (movie #5), some Gilly Weed (movie #4)
  and one can always use a little Liquid Luck! (movie #6)
An autographed picture of Gilderoy Lockhart, hubba hubba! 
(movie #2)
You should also never leave home with out your wand from Ollivanders, a copy of The Standard Book of Spells, a golden snitch for Quiditch practice (both movie #1), the Marauder's Map to help you maneuver about at night (movie #3), and a pair of extendable ears to listen in on secret conversations! (movie #6)
One would be ready for the year with a trunk packed like this!

I got the potions from Wizarding World on Etsy. All the book covers and package labels were printed also from the RPF.

You can check out the rest of the party details here:

Hogwarts School of Witchcraft & Wizardry - Acceptance Letters

$
0
0

Once my son told me that he wanted a Harry Potter themed birthday party this year I was completely beside myself! There is just so many great parties already out there but I didn't want to do the same thing. So I got to thinking what little kid would not love to go to Hogwarts right!?! That's when it hit me, that is EXACTLY what we will do! I compiled so many fun ideas from various parties and sites to inspire and incorporate into the party that you can find on my Pinterest Board.

Now the proper invitation for a Hogwarts party would be an acceptance letter of course. I used this tutorial from Hello Paper Moon to create them.
I addressed the envelopes with the location of each child's bedroom in their home and their address. We sealed them with printable wax seals fromPropPrintables.
I adjusted the text to fit in birthday party information.
Also included in the letter was their Hogwarts Express ticket, also available from PropPrintables, and a list of equipment they will need (these items were supplied for each child at Diagon Alley).
The letters had to be delivered via Owl Post and I loved the balloon idea that is all over the net. 
I used a black marker and drew an owl on the balloons and tied one to each envelope. The birthday boy wanted to deliver them by leaving them on the porch, ringing the doorbell and running away. 
I loved making the invites but that is only the beginning. I figured I would divide the party up into sections because the post would just be ridiculously long! 

You can check out the rest of the party details here:

Rainbow Dash Pony Party

$
0
0
This year my sweet little daughter wanted a My Little Pony theme for her birthday party, and her absolute favorite pony is Rainbow Dash! So I focused more on her for the main elements and fun details. Being a mom I have watched more that a fare share of kids TV shows (I have to admit that I actually kind of enjoy it) so I was pretty familiar with the characters. 

When the guests arrived they each got a Cutie Mark
I printed a bunch of different cutie marks on tattoo paper so the kids could pick something to fit their personalities.
We put them on their cheeks - not their flanks!
Then they got a pair a Pegasus wings
I made a variety of sizes and colors of wings following this simple tutorial here.
Here are pics of some of the girls all pony-fied
birthday girl all Dashed out of course!
Now time for games!
EXACTLY ON! I think someone was peeking....
Next was the Cloudsdale Obstacle Course - 
Rainbow Dash wants nothing more to be a Wonderbolt so we set up an obstacle course 
made out of clouds from her home Cloudsdale... 
The kids had to run and jump over/duck under all the clouds in 
10 SECONDS FLAT 
(Rainbow thinks she can do anything is 10 seconds flat) to become a Wonderbolt!
Once the kids completed the course they were given their Wonderbolt Wings.
 SO PROUD!
After all that running it was time for treats...
Rainbow Dash dessert table!
The main focal was my daughter's Rainbow Dash cake
We also had cupcakes with her Cutie Mark as well...
I had to find a way to include Rainbow Dash's pet turtle named Tank.
 
Rainbow is very loyal to all her friends and it is her 
'Element of Harmony'
She also likes to lounge around on clouds - 
I absolutely adore these cotton candy lollipops!
Rainbow is the only pony to ever create a Sonic Rainboom!
I made rainbow colored macarons - so yummy!
 
We also served Raindrop Drinks with rainbow striped straws and flags since the Pegasus ponies are the ones who help control all the rain clouds and weather.
 
There was one last activity for the kids to do while they snacked...
They each got a blank pony and got to color and decorate them anyway they wanted.
Green is the birthday girl's favorite color... 
At end the party each kid was sent home with some totally awesome 
Rainbow Dash party favors....
Rainbow Dash inspired favor boxes were filled with candy.
Some sweet shades will make anyone look 20% cooler
Thanks for checking out my daughter's special birthday party. I hope you enjoyed it as much as I did :)


Party styling, photographs, cake, macarons, 
cupcakes and toppers - Sweeten Your Day 
Printable Tattoo Paper - Amazon 
Pegasus wing tutorial - Bad Wolf Cosplay 
Cloud and rainbow cutouts -Shindigz
Pin the Cutie Mark game - Creative Party Games
Cotton Candy Lollipops -Dolly's Sweet Cotton Candy
Rainbow striped straws - Sweet Estelle's
French square plastic bottles -Bloom Designs Online
Rainbow Dash themed favor boxes -Shnookers
Rainbow lollipops and sunglasses -Oriental Trading
Design Your Own Pony - Ebay


'BE UGLY' Christmas Party

$
0
0
This year we hosted an Ugly Sweater Christmas party with some of our friends. It was a blast and I think it will become an annual tradition! Here are the fun invites we sent out...
Everyone brought a dish to share so we started the party off visiting and eating yummy food, and of course I had to do some festive desserts!
I had the pleasure of working with Kat from That Party Girl on Esty. She created the invites and all printables for the party. She was so great and was also able to create some custom signs to fit my idea to perfection!
I ordered these sweater cookies from ccSweets
They were so adorably-ugly and delicious!
Chocolate covered Oreos from Sweet Temptaions
I made a red velvet bundt cake with cream cheese icing topped with an ugly sweater
I also made these incredibly easy and delicious Eggnog Ice Cream parfaits wrapped with a cute little scarf and topped with little hats. You can get the recipe here from Betty Crocker.
A little hot chocolate to help keep warm
Even the whipped cream was dressed for the occasion!

For activities we played "Reverse Christmas Charades". The way you play the game is the same way as regular charades, but instead on one person getting up and acting out the word/phrase everyone on that team except one person acts it out and that one person sitting out has to try and guess what it is.... for example one was the Christmas song "Grandma Got Ran Over By a Reindeer" and one person acted like an old lady crossing a road and some of the other people were reindeer and ran her over. There were other things like decorating a Christmas tree, building a snowman, a mall Santa, etc.I hope that all makes sense!
This game was great because it was so funny and everyone got involved, no one felt awkward being up there. With all the excitement I kept forgetting to take pictures of everything that was going on, sorry I guess you will just have to try it yourself!
We also did a white elephant gift exchange, always a blast, and had an ugly sweater contest. 
everyone voted for the ugliest one and placed their vote in a tissue box that I covered with an old sweater
We handed out bottles of sparkling cider (since we don't drink alcohol) wearing ugly sweaters and a cute little hat for the prizes.
Winner of the ugliest sweater... so ho ho ugly!
We also set up a little photo prop station for those who wanted to pose in their all their ugliness!

The hubs and I in our ugly sweaters
I was able to find my turtle neck and retro Christmas vest at a thrift store for $5! My hubby has loved the Simpons ever since he was a kid, so I sewed one of his slippers on his sweater and hot glued on the words.
Thanks for checking out our party and hope you all have
an Ugly Little Christmas too!

Hippie Valentines Party

$
0
0
This year for Valentines I wanted to do something different than the usual parties you see all over. I wanted it also be vibrant, full of energy, and something that both boys and girls would be into....
plus the 60's had been on my mind for awhile so I thought that this would be perfect! 
Here is a peak into out Hippie Valentines Party!

First when the guests arrived we had a little table set up for them to get all GROOVY!
The table was set with a beaded curtain backdrop and a tie dye table cloth.
There was a variety of headbands, beaded 'Peace' sign necklaces, and Beatles glasses with colored lenses to wear.
For activities the kids make Tie Dye Hearts.
They are simple to do and don't use very many materials. Hop on over to Mom to 2 Posh for the complete dyi instructions...
They turned out so cute and each one different...

 I also picked up some Valentine cards from our local grocery store that came with mini tattoos,
they were too perfect!
 Peace & Love 
 After the activities we all got to Hang Loose and enjoy some refreshments while jammed out to some music from the era.
I just loved how colorful and festive the dessert table was!
I had the pleasure of working with Mimi's Dollhouse on Esty to design the custom printables for this party, I just love how they turned out!
There were so many yummy treats...
I placed Tie Dye square lollipops on top of a rainbow tambourine.
Filled a lave lamp with colored chocolate candies.
Vintage Fondue Pot from Wee Lambie Vintage.
One of my favorite details from the party was the vinyl record cupcake tower I made!
I just have to show you a pic without all the cupcakes so you can fully see, it just makes me smile!
I also could not get over how perfect, and delicious, these cookies were from Sweet C's Bake Shop also on etsy.
The Tie Dye cupcakes were so fun to make, just love the variety of colors. Each one turned out so different and unique.
  
  
The fondue was definitely the biggest hit of the party, also the messiest :)
 
The large flower and party cutouts I got from Shindigz set the mood perfectly!
 I hope you Dug our little party and gives you some inspiration to throw your own Out of Sight celebration! From our family to yours, here's wishing you all a 'Hippie Valentines Day!'

Come One! Come All! 1st Birthday

$
0
0

Last month was my sweet little baby girl's first birthday, I just can't believe how fast time goes by! 
I wanted to do something fun, but not over the top... now with 3 birthdays every year I figure we may start having to do them a little more 'budget friendly' if you know what I mean :)
I love the idea of this being the first celebration of many for her so I thought the phrase "Come One, Come All" was perfect, and who doesn't love the circus right!?!
Here is the cute little birthday girl in here Ringmaster outfit
Sorry for the fuzzy pics, my camera wouldn't focus!
Now that the camera started working properly, so frustrating, here is more pics...
The party was smaller with just family, so I set up a smaller table for all the little cousins.

At each place setting there was a circus party hat and cute little circus tent favor box with a gumball animal inside. 
I just adored these circus tent boxes, they fit the gumballs perfect!
We had clowns, elephants, lions, monkeys, and tiger gumball buddies from the Peppermint Place.
We also had cute animal circus animal cutouts for the table centerpieces.
I set up a small circus tent dessert bar. We kept the treats light and simple for this party.
Adorable custom circus sign from Wants and Wishes and I made the circus tent from plastic table clothes from a local party store.
For the birthday cake I decided to do keep with the theme and do 3 to resemble the 3 rings at the circus.
The elephant topped off the design holding a number 1 flag
but my favorite was this little guy...
On one side of the cake we had a sweet side of circus treats...
First no circus would be complete without cotton candy!

Animal Cracker Cookies, Marshmallow Peanuts, and sweet Kettle Corn popcorn.
On the other side we had matching treats that were not as sugary...
There was buttered popcorn, salty peanuts, and animal crackers.
We had to incorporate clowns into this circus themed dessert table as well...
Clown Nose Suckers!
also a custom printable from Wants and Wishes
and one more shot of the cake just because I loved it!
All the party hats, cotton candy cones, popcorn boxes, and circus tent favor boxes were from Oriental Trading.
 
I made the birthday girl's top hat and tutu, the onesie was from Cupcakes Cottage
 My cute little clowns!
She LOVED her smash cake :)
I hope you enjoyed our little circus celebration and can't wait for more to come!


Hollywood Teacher Appreciation Week

$
0
0

This year I was asked to plan the Teacher Appreciation week for my son's school. I have been so grateful for all his teachers and those who work at the school so I jumped at the chance! I knew exactly the theme I wanted to go with and how I wanted it presented.... I decided on the theme "You're A Star" with a Hollywood feel to it. About 2 weeks before the event I put up flyers around the school to get the students and teachers excited. At our school we usually have daily themes/activities that kids can participate in to show their gratitude. Here they were...
Then the week before we passed out flyers to all the teachers of the daily events we had planned for them...
We also sent home reminders sheets to all the students of the daily activities so they could come prepared that Monday...
(for the teacher information sheet we gave the teachers a quiestionairre to fill out of some of their favorite things like restauraunts, treats, drinks, hobbies, flowers, family friendly moives, etc. Then we typed the information all up on a spread sheet and sent home with the reminder sheets.)

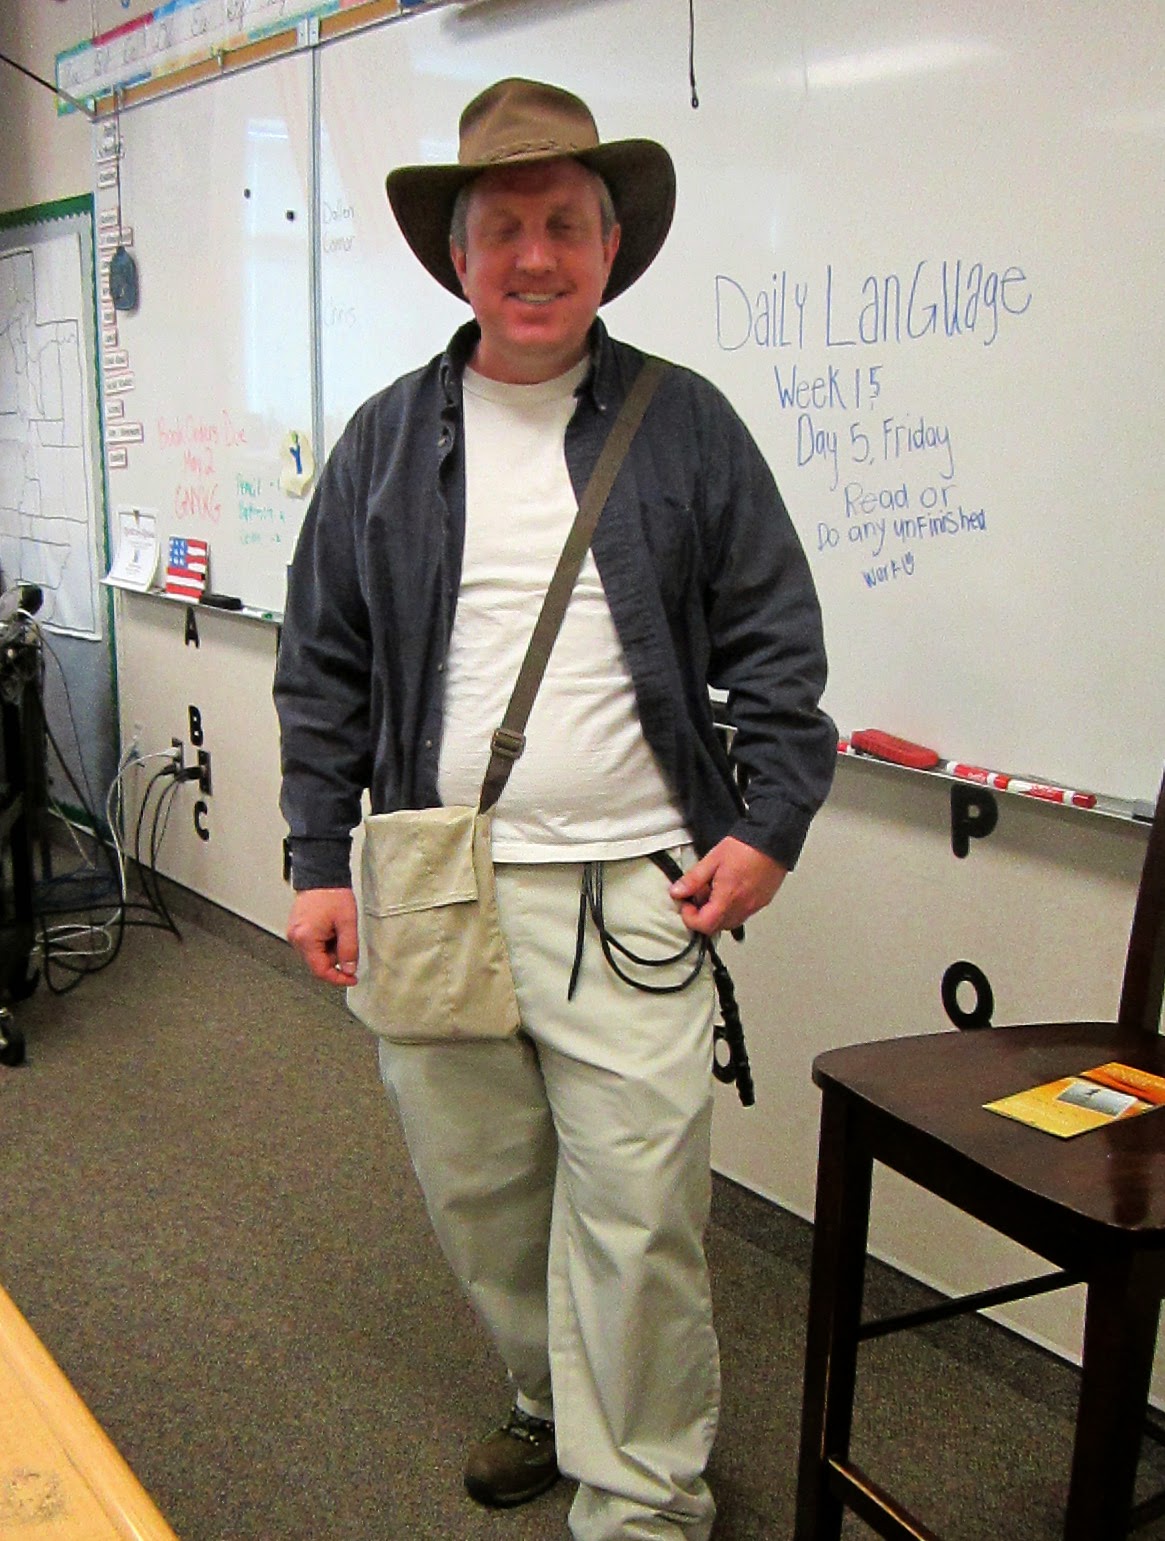
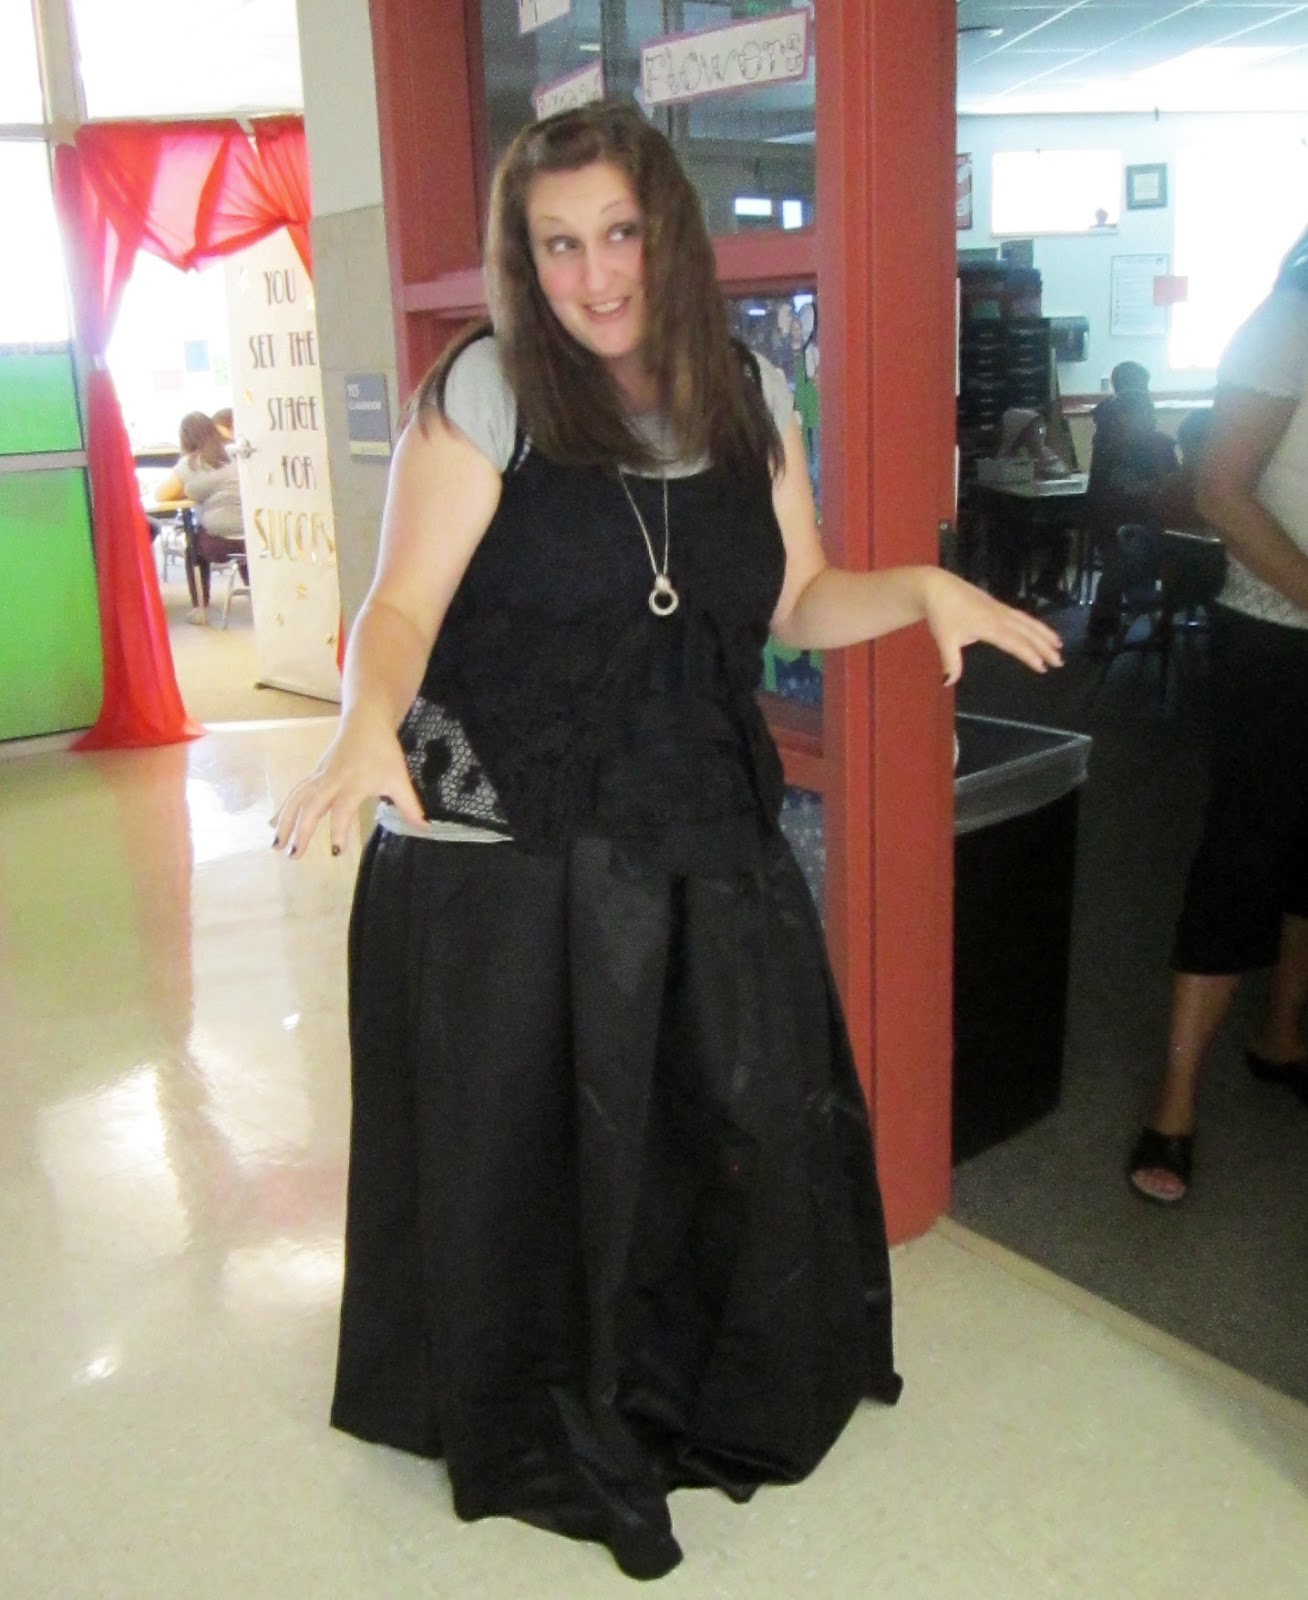
  One of the most popular things that the teachers look forward to during this week are the door decorations! About 2 months before the event I set up signups for people to decorate all the doors (teachers, office workers, librarian, custodians, aids, school nurse, etc... even one for the bus drivers), with a total of 62 doors it wasn't an easy task! Then the Friday before teacher appreciation week all the volunteers came in after school and decorated the teachers door so they could see it on Monday morning. They all looked so great! Here is the door that I did...
I wanted to keep with the theme for my door, but was totally blown away at the creativity and details of all the other ones people made. You can see them on our school PTA blog here.
Now for the part that I was REALLY excited for... decorating the school! Normally the doors are the only things that get done up for teacher appreciation week but I just couldn't help myself... 
I really couldn't!

The Saturday before we got keys from one of the teacher and snuck in to decorate so it would be a big surprise to everyone on Monday morning!  We hung a large marquee banner I made in the library so everyone would be reminded as they came to school or drove past.
Our schools name is Hidden Hollow, so I made large HOLLOWOOD letters to look like the Hollywood sign to set the mood as they entered the school, I know kinda cheesy but I loved it anyway!
We created a large 'Walk of Fame' when you came through the doors.
We had a total of 92 teachers and staff (including all the aids, lunchroom workers, custodians, office,  specialty teachers, etc.) because we didn't want to leave anyone out, they all are an important part of our school! So we had to have some of the stars go around the staircase and down hallways. 
The teachers and kids absolutely LOVED this! The kids would search the whole school looking for their teachers and hop from square to square while they went down the halls.
We also decorated the faculty lounge.
The teachers got to walk to red carpet as they entered the lounge with stars and hollywood lights hanging down.
Complete with red ropes and paparrazzi!
We also covered all the tables with black table clothes and added some red tinsel and gold stars to dress them up a bit.
Each day we treated the teachers and staff with food or refreshments in the lounge to enjoy.
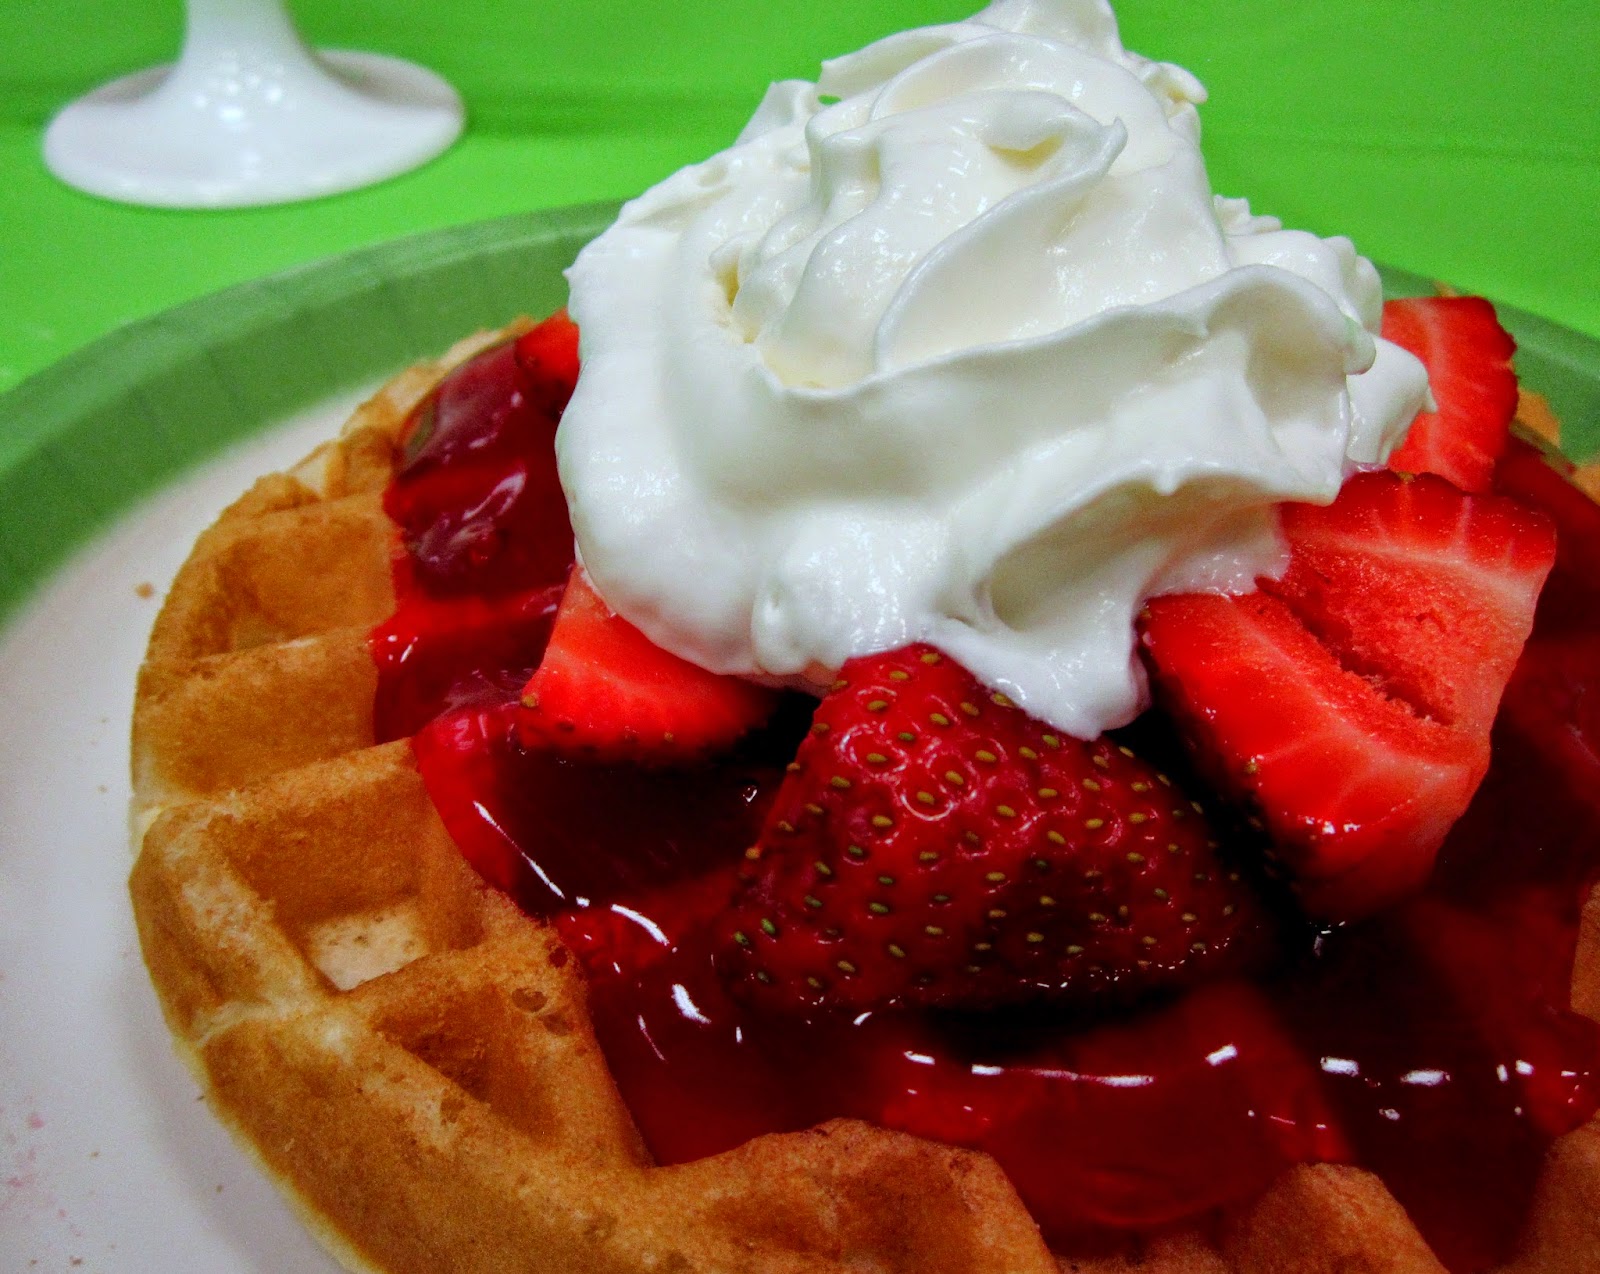
MONDAY - VIP Breakfast
Parfait bar breakfast
We wanted to serve something that was not too heavy but also healthy enough that the teachers could customize to their diet.
Fresh fruits and yogurts to choose from...
Delicious waffle bowls so they could eat this breakfast on the go because we know how busy teachers are!
TUESDAY - Walk the Red Carpet
Refreshments served in the lounge all day
The centerpiece for this dessert bar were these AMAZING cookies my neighbor made!
Licorice movie reels
Star shaped brownies with covered with edible gold sparkle dust
Movie reel, megaphone, camera, and clapperboard table decorations...
Tuxedo Chocolate Trifles - complete with little bow-ties!
Red velvet whoopie pies with cream cheese filling
WEDNESDAY - Swag Day
We passed out gifts to all the teachers and staff.
Also there was fresh veggie bowls on all the tables for the teachers to snack on in the lounge.
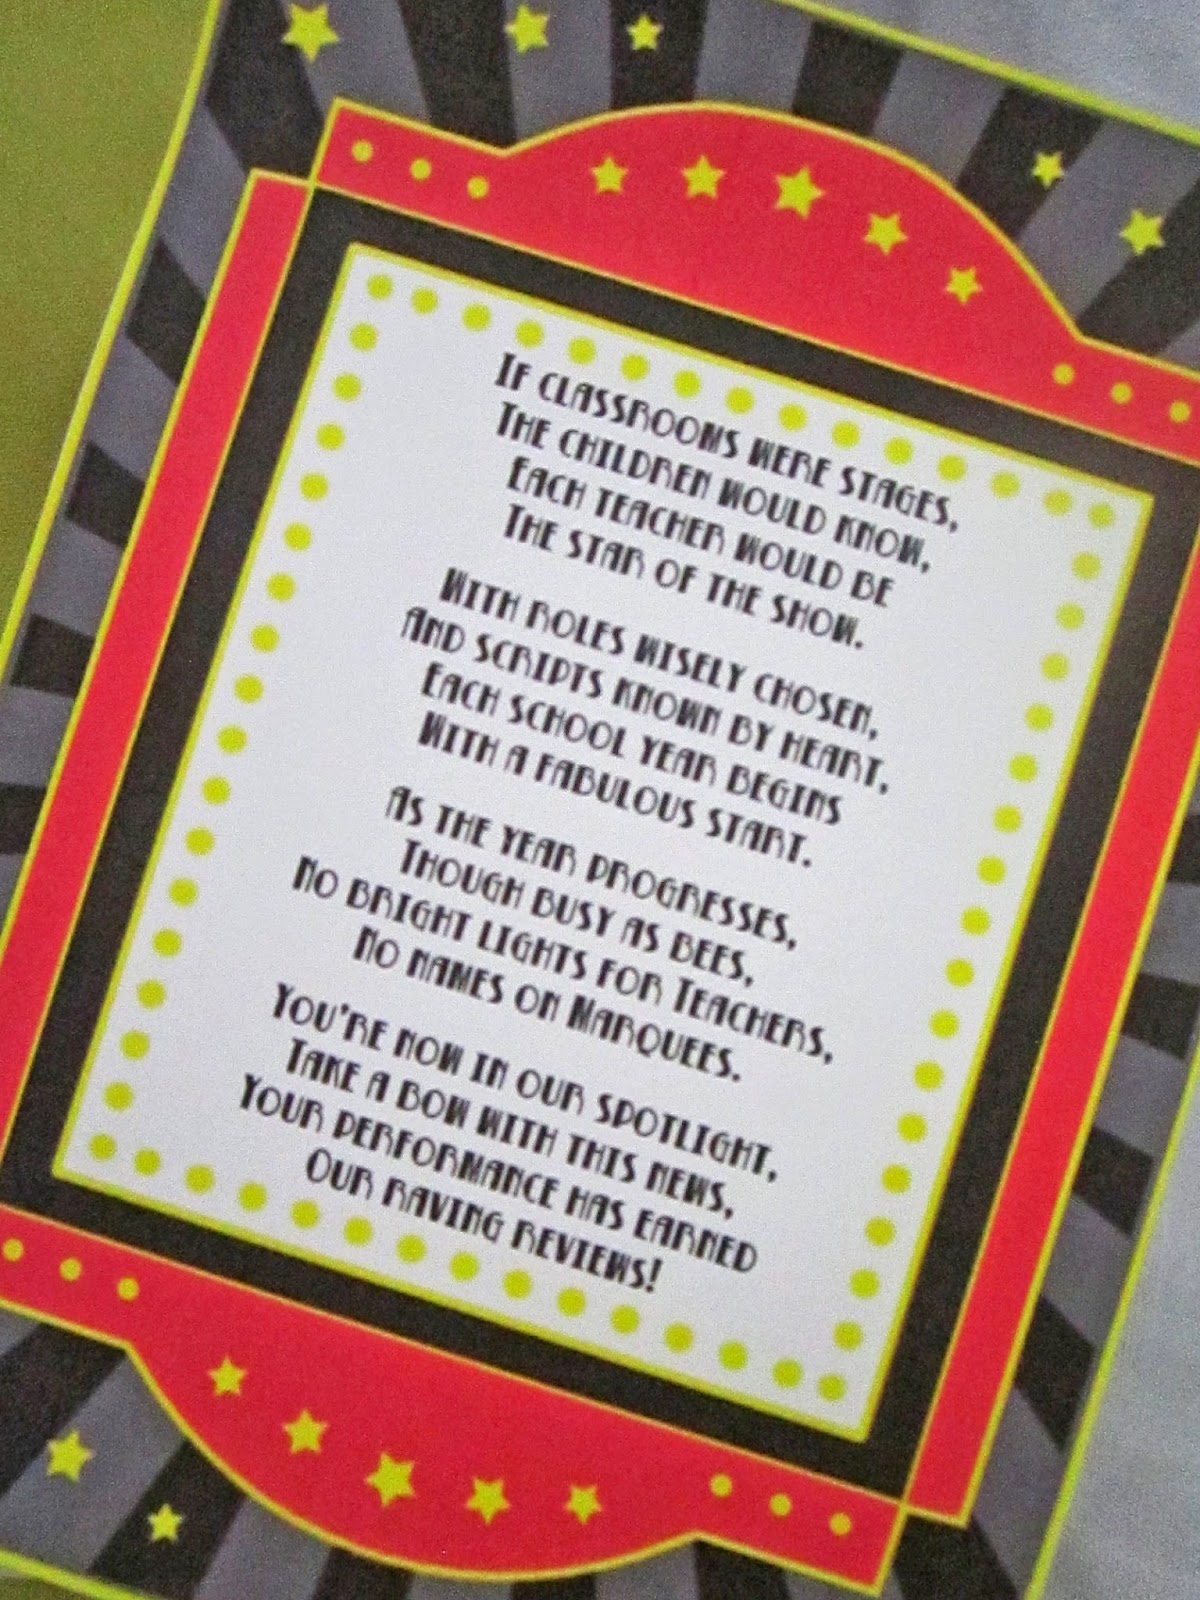
We put together 'Swag Bags' for all the teachers and staff and hand delivered them all to the classes and workrooms. The bags had the school logo on them and inside was a movie night!
Each bag had a movie theater candy box,
an adorable thank you poem,
a bag of microwave popcorn,
a 16oz drink,
and a Redbox code for a free rental.
Wednesday was also the day the students brought gifts to their teachers, here is my little man and his fabulous teacher! She has really worked hard and we are so grateful for her!
THURSDAY - Star Treatment
A local chiropractor came and did FREE massages in the lounge for the teachers during lunch, which was SO AWESOME! Another mom made lots of different yummy flavors of popcorn and we set up a popcorn bar for them to snack on while they relaxed!
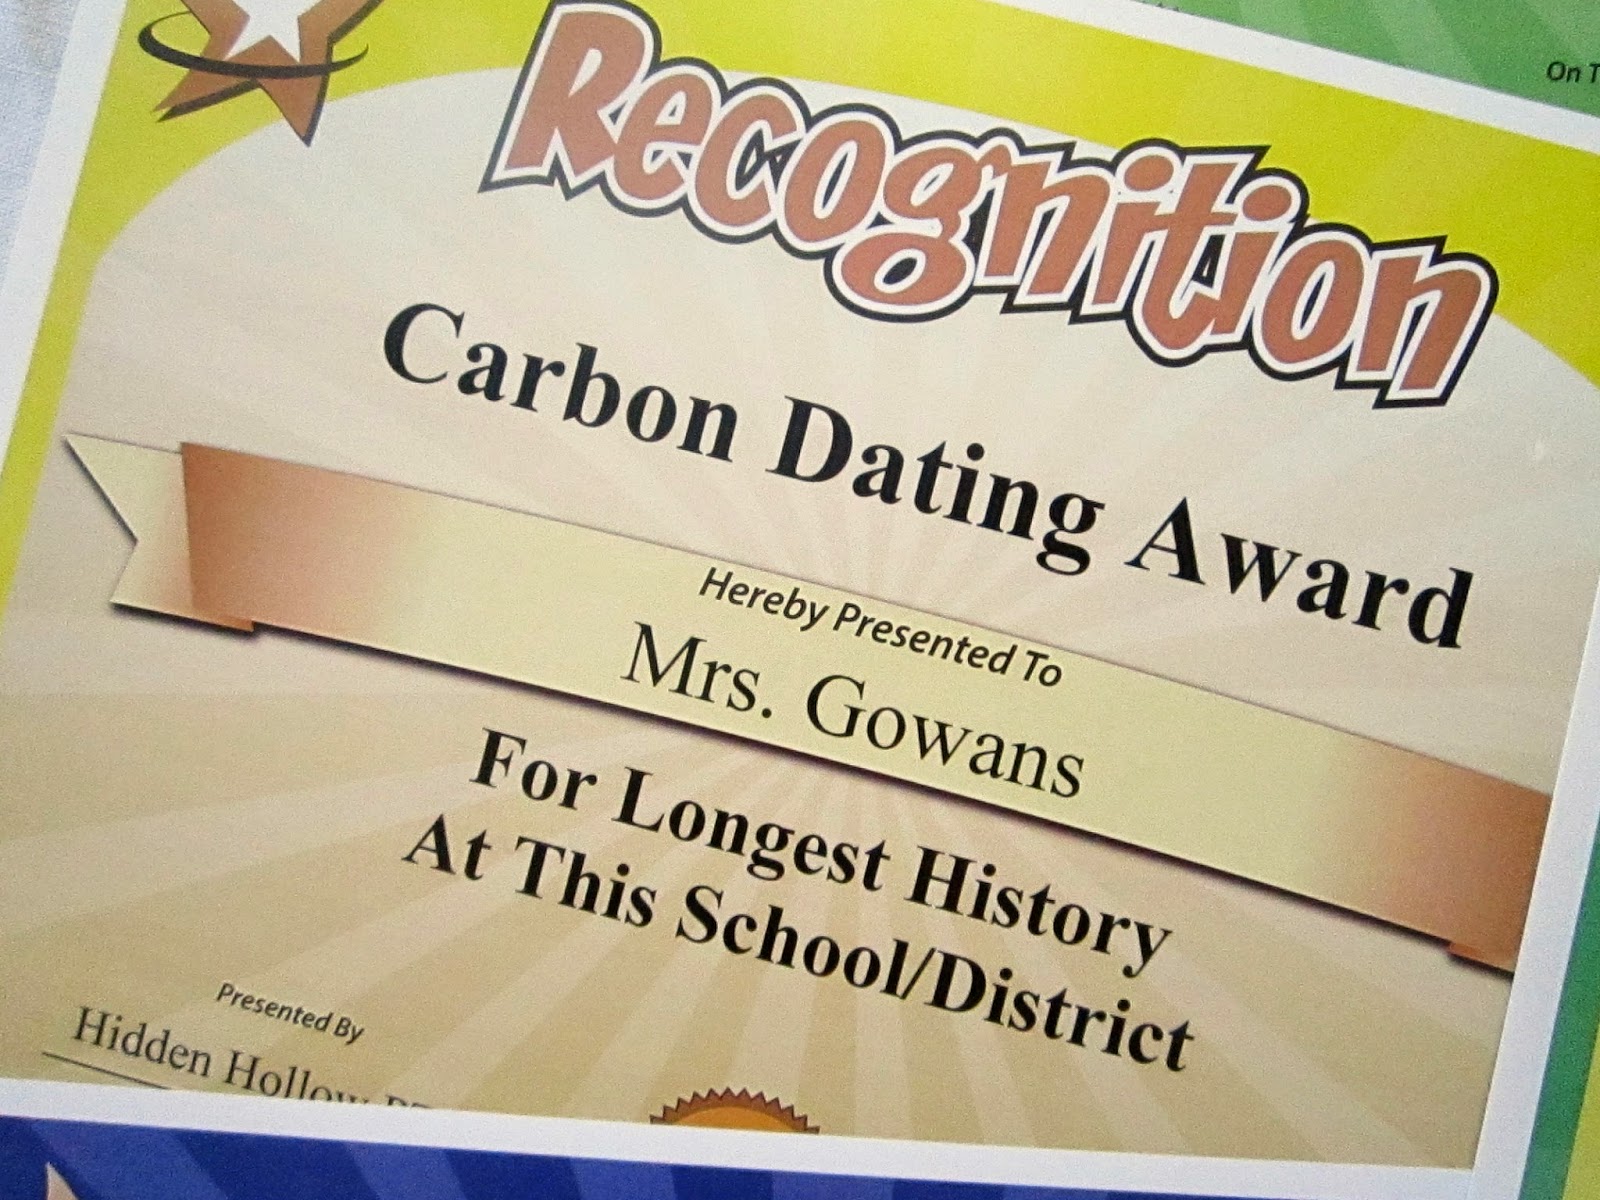
FRIDAY - The Star You Are
We served a taco salad bar for lunch in the lounge

Students were able to dress up as characters from their teacher's favorite family movie... it was so cute to see classrooms full of little minions, princesses, pirates, and dalmatian puppies! Teachers also channeled their inner movie star and dressed up for some prizes donated from local stores. Here are some of them...


We had gift cards donated from Olive Garden, Applebees, a local cafe, but our grand prize was a movie package donated form Megaplex Theaters with 2 movie tickets, 2 mugs with refills, and a large popcorn coupon!

And the grand prize winner was....

Call me bias but I sure do love Frozen and we thought it was creative!
Also each morning we had the principal announce a few awards over the speakers for teachers. It was a great way to spotlight everyone. Here were some of my favorites...

These teacher awards were so cute and funny! There was one to fit each teacher perfectly!
We went around to all the classrooms and delivered the certificates along with a little star trophy. The kids all clapped and cheered for their teachers, so adorable!
Well that pretty much wraps up our Teacher Appreciation week! I hope you know how grateful we all are! Each parent is so lucky to have such great teachers and staff at every school, you all are truly STARS! Thank you for the hours of hoard work, dedication, and everything you do for the children to help them learn and grow!

It's Great to be 8!

$
0
0
My sweet little guy turned 8 this year, which is an important age in our church. 8 is the age when children can choose to be baptized and make certain promises to our Father in Heaven. If you would like to learn more about our religion and baptism you can go here
This is a special decision that each person makes and we like to support and celebrate it! To prepare our son for this decision we discussed the responsibilities and meanings of the promises we make at baptism and how this is the first of many steps in following our Savior, Jesus Christ. 
When he decided that he would like to get baptized we sent out invitations to all our close friends and family to share in this experience. Also the primary leaders from our church gave him a special towel  that he could use on his baptism day.
Here is a cute poem that explains the symbol of the towel
When guests arrived we had a table set up with programs and a special set of scriptures that they could mark and share their testimonies for him to keep.
I had the pleasure of working with Kara fromPocket Full of Pixels and her adorable designs. She created all the invitations, programs, printables, and custom signs for our celebration.
After the baptism ceremony we had a brunch for all our friends and family. When planning the brunch I wanted to carry the blue and green color scheme from the invitations and programs into the tables and set up.
I also wanted to add some sort of element to add variety and accent the color scheme as well, so I decided to use neckties for this occasion.
We got various pictures of Mason taken around one of the temples and put them on the tables for centerpieces along with some scriptures and flower vases. 
Here was one of my favorite pictures...
We let Mason pick what to eat for the brunch since this was his celebration, and he immediately decided on waffles (his favorite breakfast food). As I was searching around for different ideas I found this adorable idea and printables for an LDS themed waffle bar from Joann's Special and just had to use it!

I did a necktie napkin fold to place the forks in... I am just loving it!

We had family members bring their waffle irons and set up a large table for guests to cook their own waffles.
 Now for the fun part, the toppings!

I adjusted some of the waffle bar flavors from Joann's Special to fit the tastes of younger guests, but kept the titles because they were just too perfect!


A savory one for those who don't have a sweet tooth...

 We kept beverages simple and served bottled water, but of course had to have matching labels!


 And one with a necktie just for fun!

There was a table of treats set up as well...
just encase you didn't get enough sugar!
To style this table I used key elements from a setup in Sweet Designs by Amy Atlas but in a blue and green scheme. The preppy look with the neckties were just perfect for our event! 
number 8 donut pops
Kit Kat bar covenant reminders...
Little treat boxes filled with blue and green M&M's and tied with a little blue necktie
Loved these coordinating cupcake toppers
The most adorably delicious CTR cookies ever made by my neighbor, maybe one day she will start selling them online and you can all taste the deliciousness!!!
"Chews" the right gumball tubes

Event Styling and photographs: Sweeten Your Day
Dessert table inspiration: Amy Atlas
Banner, invitations, programs, signage, candy bar wrappers, tags, and cupcake toppers: Pocket Full of Pixels
Waffle bar printables: Joann's Special 

50's Diner Trunk-or-Treat

$
0
0

Our church hosted a neighborhood Trunk-or-Treat this year. I love trunk or treats! They are a great way for neighbors and friends to get together, visit, eat, and let the kids do a little trick or treating in a fun and safe environment. When it was announced that there was going to be one I new immediately that I wanted to do something with a 50's theme because I had so many props from a previous party  and I love to reuse supplies as much as I can. After some brainstorming I decided on doing a diner out of our trunk, and this is what I came up with...
We all dressed up to match our trunk; hubs was a diner waiter, little Afton and I wore poodle skirts,
Mason was a Greaser,
and my sweet little Avery was a carhop waitress...
For the trunk we reused our 50's soda fountain bar that I got from Shindigz a little while back for our main piece. Then we added a bunch of little items to accent the whole thing. I loved the way it turned out!
Libby from Andersruff custom created a diner menu that we used for a backdrop to match the colors and style of the diner bar. I absolutely love the way it turned out!
We hung plastic records with fish line to hide the top of the trunk hatch.
For our treat we served mini hamburger cupcakes with cookie fries and milkshake cupcakes.
When the kids came up to the trunk they could pick (order) which one they wanted ")
The quick view inside the back of our van... so many hamburgers!
On top of the soda fountain bar we placed a vintage style straw dispenser and a tabletop jukebox centerpeice.
I also added a larger milkshake style cupcake next to a vintage style menu on the other side.
The jukebox was made out cardboard so I put a little sound box inside that played some 50's rock n roll music to add to the atmosphere.
I also set a small table with with some ketchup/mustard bottles and a napkin dispenser next to the bar to finish off the 'diner' look.
Open for business!
It was such a hit and the kids LOVED ordering their food ") 
We 'sold out' of the milkshake cupcakes first, but the hamburger and fries were hit with the older kids and adults!
Avery absolutely loved serving up sweets with her daddy, 
best customer service I have ever received!

Tumble and Twirl Gymnastics Birthday!

$
0
0
My little Avery turned 5 last month and wanted to do a gymnastics party with all her friends! I had to do something bright and colorful that fit her age range. As soon as I found The Birthday House on Etsy I fell in love with their set! 
They were exactly what I was looking for!
I used the cutouts for the main centerpieces on the tables and to hold bouquets of balloons.
When the girls arrived they ran around and played a few games and ate some treats... 
 
I created a balance beam cake for the focal point of the treats.
Using a chocolate mold I got from Amazon, I also created little gold medals with yellow melting chocolate and attached a purple ribbon with more chocolate on the back.
Avery loves watching the rhythmic gymnastics so I decided to fill long candy tubes with mini gumballs and attached long strands of ribbon and a jewel on top to make ribbon wands to incorporate that into the table.
We had a cookie rose bouquet set up for the awards ceremony
One of my favorite things were the vaulting cupcakes on this table ")
I also got these bright pink water bottles from Birthday Express and added vinyl stars and names of each of the girls.
  Larger gymnastics toppers from The Birthday House accented the dessert table and cake to give them the finishing touch!
After some little games and treats we all packed up and headed off to my daughters gymnastics center for the real fun! Her gym lets you rent it out for private parties and events, it was so nice having the whole place to ourselves for the girls to practice and play whatever they wanted! 
....getting all chalked up!
  
The giant foam pit was the absolute best! I even had to jump in... no picture of that though ")
We also did a little rhythmic gymnastics...
The girls all had so much fun and did so great they were all winners and got gold medals and a rose!

Christmas Wonderful Link Party

$
0
0
Elf spaghetti! Enjoy a fun dinner with the family with green noodles and marinara sauce. Don't forget the Mozzarella snowballs! Design Dazzle
Did you know that Santa's elves have a favorite dinner? Elf spaghetti is what they always choose to eat on Christmas Eve. To see the easy and yummy details go here

 You may have seen Design Dazzle's 5th annual Christmas Wonderful series is in full swing! We've had some fabulous Christmas ideas from some talented bloggers and we're not done yet...the fun continues through the middle of December! Over the years we've shared almost 200 blog posts with hundreds and hundreds of ideas. We thought it would be fun to have a great big link party to celebrate this magical Christmas season because we know YOU have some awesome ideas to share too! Simply link up your project below, which will show up on all of the 25+ blogs participating in our link party. Feel free to link up new projects as well as any past projects that you want to share. The link party ends Decemember 7th. We will be choosing some of our FAVORITE ideas to feature! a few days later.

 The following amazing blogs are participating in our Christmas Wonderful link party:
Viewing all 54 articles
Browse latest View live